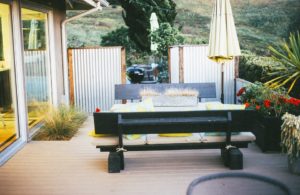
Creating a Stone Patio For Your Home
Start by measuring your outdoor space and sketching a rough layout. Think about how you'll use the area — whether for dining, lounging, or entertaining — and let that guide the shape and size of your patio. A rectangular patio suits most gardens, but irregular shapes can add visual interest and better complement the natural contours of your landscape.
Choosing the right stone
The type of stone you choose will define the look and longevity of your patio. Natural options like sandstone, slate, and limestone are popular for their durability and timeless appeal. Sandstone offers warm, earthy tones and is widely available across the UK. Slate provides a sleek, contemporary finish, while limestone brings a classic, refined look to any garden. For a more budget-friendly option, reconstituted stone (also called porcelain paving) closely mimics natural stone at a lower cost.
Preparing the ground
Good preparation is the foundation of a successful patio — quite literally. Begin by marking out the area with pegs and string, then excavate the soil to a depth of around 150–200mm. This accounts for a compacted hardcore base, a layer of sharp sand, and the stone itself. Poor preparation is the most common cause of uneven, sunken patios, so take your time at this stage. A slight slope away from the house (roughly 1:60) ensures rainwater drains properly and doesn't pool near your foundations.
Laying the stones
Mix a semi-dry mortar (five parts sharp sand to one part cement) and lay it across the prepared surface to a depth of about 40mm. Place each stone firmly, tapping it down with a rubber mallet and checking levels with a spirit level as you go. Leave consistent gaps between stones — typically 10–15mm — for pointing later. Work methodically from one corner outward, and avoid walking on freshly laid stones for at least 24 hours.
Pointing and finishing
Once the mortar beneath your stones has cured (allow 24–48 hours), it's time to fill the joints. Traditional sand and cement pointing works well, though brush-in jointing compounds are easier to apply and increasingly popular with DIYers. Press the compound firmly into each joint and smooth it flush with the stone surface. Avoid pointing in wet or frosty conditions, as this can compromise adhesion. Once complete, consider applying a stone sealant to protect against staining and weathering — particularly useful for lighter-coloured stones like sandstone and limestone.
Adding the finishing touches
A well-laid patio is only the beginning. Edging the perimeter with cobble setts or reclaimed brick adds structure and prevents the surrounding soil from encroaching on your stonework. Low-growing plants tucked into the borders soften the edges and help the patio feel like a natural extension of your garden. Outdoor lighting, a few carefully chosen pots, and comfortable furniture complete the picture — turning a simple slab of stone into a genuine outdoor living space.
Is it worth doing yourself?
A DIY stone patio is absolutely achievable for a competent home improver, and the savings compared to hiring a professional landscaper can be significant. That said, the project does require physical effort, the right tools, and a good understanding of drainage and ground preparation. For large or complex layouts, it may be worth consulting a professional for at least the groundwork stage. Get that right, and the rest of the project becomes far more manageable.